Last Updated: November 4, 2026
Quick Summary
A residential wildlife inspection is a structured evaluation of a property for animal activity, entry routes, and damage. It covers an interior sweep, exterior read, attractant review, and risk scoring, answering what is inside, how it got in, and what it has already ruined.
- The technician walks the exterior at ground level and again from a ladder at the roofline.
- The attic is entered with a respirator and eye protection, and each finding is photographed.
- A quote given before the attic and crawlspace are physically entered is a guess, not an assessment.
- A free estimate is a sales visit; an inspection is a diagnostic visit with a written record.
- Removal without exclusion is a recurring expense, and each cycle adds damage.
Table of Contents
- What a Residential Wildlife Inspection and Risk Assessment Covers
- Signs of Wildlife in the Attic and Elsewhere in the Home
- Wildlife Entry Point Assessment: Reading the Exterior
- Structural Damage and Wildlife-Borne Disease Risk
- Wildlife Attractants and Property Conditions
- DIY vs. Professional: Where the Risk Threshold Sits
- Wildlife Exclusion Services Cost and Long-Term Value
- Schedule Your Residential Wildlife Inspection
- Frequently Asked Questions
What a Residential Wildlife Inspection and Risk Assessment Covers
A residential wildlife inspection and risk assessment is a structured evaluation of a property for animal activity, entry routes, and damage.
Most homeowners call after they hear something. The inspection answers three questions: what is inside, how it got in, and what it has already ruined.
The work follows a defined sequence. Skipping a step is how animals come back three weeks after a trap line is pulled.
The Four Parts of a Site Assessment
- Interior sweep: attic, crawlspace, basement, and utility voids checked for nesting areas, droppings, and chewed wires.
- Exterior read: roofline, soffit and fascia, vents, chimney, foundation gaps, and grading checked for wildlife entry points.
- Attractant review: food, water, and shelter conditions that invite nuisance wildlife onto the property.
The last part is the one homeowners undervalue. A risk assessment tells you whether you have a nuisance problem or a hazard problem, which carry very different timelines.
What the Technician Actually Does, Step by Step
A professional inspection is not a walk-around with a flashlight. Each step feeds the next.
- Interview and history. The technician asks when the noise started, whether it is worse at dawn or dusk, whether there are pets or children, and whether prior removal work was done. A previous trap-and-release job with no exclusion strongly predicts a repeat problem.
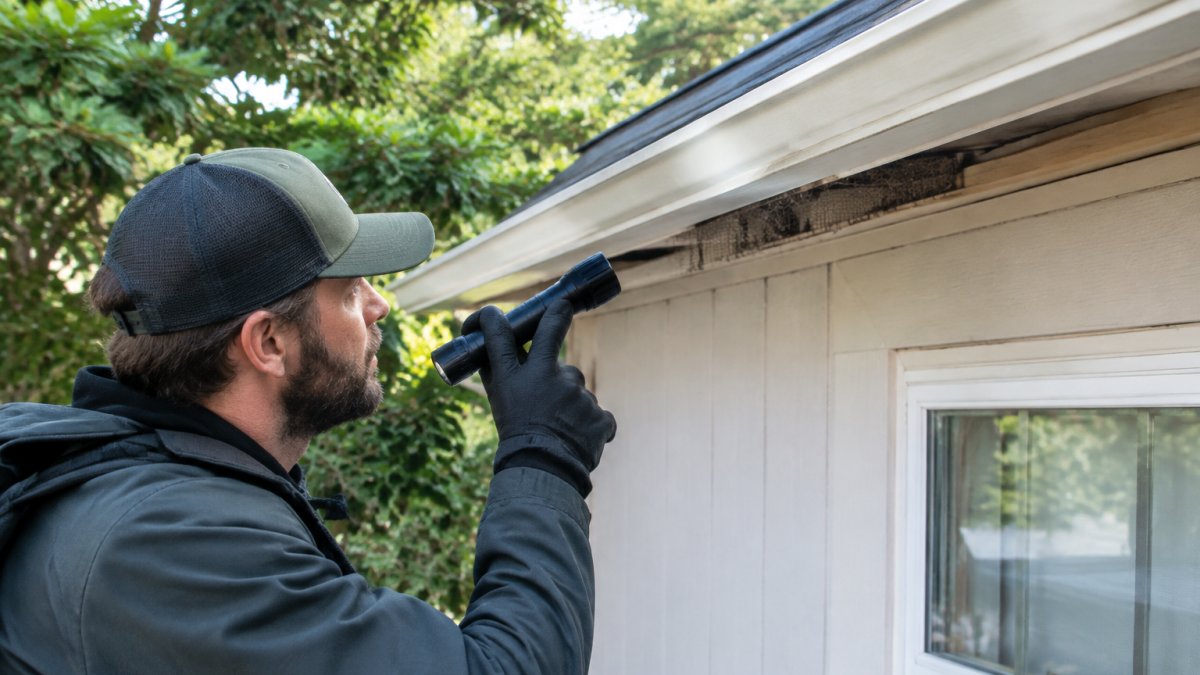
- Exterior perimeter walk. The exterior is walked at ground level and again from a ladder at the roofline, looking for gaps larger than a quarter inch and for rub marks, hair, and droppings at those gaps.
- Roof and attic access. The attic is entered with a respirator and eye protection. The technician maps nesting sites, latrine areas, insulation disturbance, and chewed wiring or ductwork, photographing each finding.
- Crawlspace and foundation. The crawlspace is checked for moisture, vent screens, and foundation penetrations. Damp crawlspaces attract a different species mix than dry attics, and the remediation plan changes accordingly.
- Attractant and condition review. Trash storage, compost, pet food, bird feeders, irrigation leaks, and vegetation contact with the structure are documented.
- Written risk scoring and report. Findings are scored by structural risk, contamination risk, and urgency, and the report lists next steps in priority order.
What the Written Report Should Contain
A report that only says "raccoon in attic, recommend removal" is not a risk assessment. A useful report includes:
- Species identification based on evidence, with the basis noted.
- Entry point inventory described precisely enough that a second technician could find them.
- Photographs of damage, droppings, and entry points, dated.
Watch out: a quote given before an attic and crawlspace have been physically entered is a guess, not an assessment, and it usually undercounts entry points.
How Long an Inspection Takes and What It Costs
Inspection time depends on attic and crawlspace access, roof pitch, and how many structures are on the lot. Detached garages, sheds, and guest houses each add time because each is a separate envelope with its own entry points.
Pricing depends on the property, the number of structures, and the scope of work. For current prices or a quote, contact Ekoterra Gopher Pest and Wildlife Control through its website.
Inspection Versus a Free Estimate
A free estimate is a sales visit; an inspection is a diagnostic visit with a written record. The difference matters when the problem is ambiguous: noise but no visible damage, or damage but no current activity, calls for the diagnostic version.
For a step-by-step breakdown of sealing a home properly after the inspection, see our guide to wildlife exclusion steps for family homes.
The inspection follows a defined sequence, with each step feeding the next.
| Step | What the technician does |
|---|---|
| Interview and history | Asks when noise started, pets or children, prior removal work |
| Exterior perimeter walk | Walks ground level and roofline, looks for gaps over a quarter inch |
| Roof and attic access | Enters attic with respirator and eye protection, maps and photographs findings |
| Crawlspace and foundation | Checks moisture, vent screens, and foundation penetrations |
| Attractant and condition review | Documents trash, compost, pet food, bird feeders, irrigation leaks, vegetation contact |
| Written risk scoring and report | Scores structural risk, contamination risk, and urgency; lists next steps in priority order |
Signs of Wildlife in the Attic and Elsewhere in the Home
The clearest signs of wildlife in the attic are sounds at dawn or dusk, droppings in a concentrated area, stained or torn insulation, and rub marks where animals squeeze through a gap. For removal options, see eco-friendly pest and wildlife control.
Attics are the default because they are warm, dry, and rarely entered; crawlspaces run second. Homeowners notice noise long before damage, and the noise is the cheaper discovery.
Look for these markers:
- Nesting areas: shredded insulation, leaves, or fabric packed into a corner or between joists.
- Runways: flattened insulation or grease trails along beams where animals travel repeatedly.
- Gnaw marks: on rafters, wiring, or PVC pipe.
Droppings Identification and What It Tells You
Droppings identification narrows down the species and timeline. Size, shape, and placement separate rodent from raccoon from bat, and fresh droppings confirm the animal is still resident rather than a past tenant.
Never handle droppings bare-handed. Some wildlife waste carries pathogens, and dry material in a closed attic can become airborne dust. Gloves, eye protection, and a respirator are baseline equipment.
Wildlife Entry Point Assessment: Reading the Exterior
A wildlife entry point assessment starts at the roofline and works down, because most mammal entries happen above the first floor.
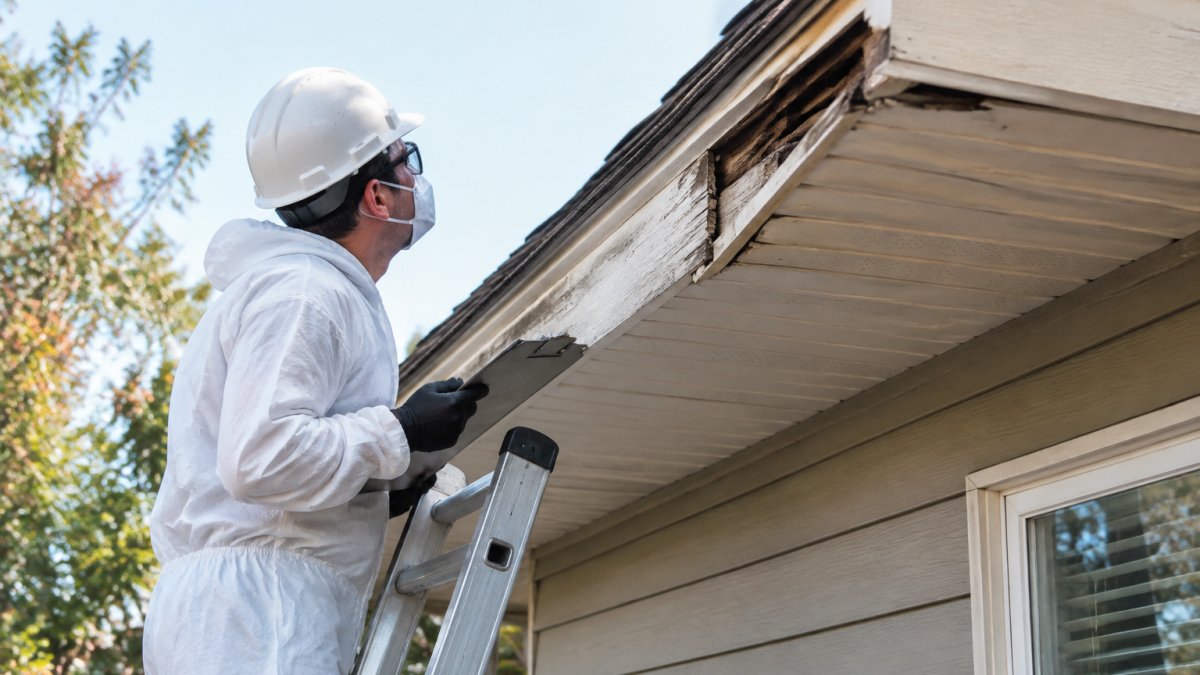
A common mistake is sealing a hole before confirming what is inside. That traps an animal in the structure, and the outcome is worse than the original problem.
For a step-by-step breakdown of sealing a home properly, see our guide to wildlife exclusion steps for family homes.
Roof, Soffit, and Ventilation Screens
Roof, soffit, and ventilation screens fail in predictable places. Ridge caps lift, fascia boards rot behind gutters, and dryer or gable vents lose their screens and become open doors.
- Soffit gaps: small openings at the fascia line, often invisible from the ground.
- Ventilation screens: torn or missing mesh on gable, foundation, and dryer vents.
- Chimney caps: absent or loose caps invite birds and raccoons.
Check these four and you have covered the majority of real entry routes on a typical home.
Structural Damage and Wildlife-Borne Disease Risk
Structural damage from wildlife is cumulative and quiet.
Wildlife-borne diseases add a second layer. Raccoon latrines, bat roosts, and rodent nests all concentrate material that requires proper sanitization protocols rather than a shop vac and a mask.
This is where a risk analysis framework earns its keep: a small, recent entry with light droppings is manageable, while a years-old raccoon latrine above a bedroom ceiling is a contamination and remediation project.
Grading Structural Damage
Structural findings are usually sorted into three tiers, because response time and cost differ sharply between them.
- Cosmetic and reversible. Flattened or lightly soiled insulation, staining on sheathing, torn vent screens. Corrected during exclusion and cleanup; rarely changes the scope.
- Repairable with trade involvement. Chewed wiring, damaged ductwork, compromised flashing, or a rotted fascia board behind a gutter. These need an electrician, HVAC technician, or roofer in addition to wildlife control, and the wildlife work should not be signed off until the trade repair is scheduled.
- Structural. Saturated drywall or ceiling board, compromised rafters, or a sagging ceiling line. These indicate long-running moisture and animal activity together, and homeowners should get a contractor's opinion before authorizing cleanup.
Watch out: chewed wiring is often hidden behind insulation batts, so a visual pass from the attic hatch will miss it. The technician has to move insulation to check the runs.
Disease Risk by Species
The disease conversation is species-specific; generalizing it either scares homeowners unnecessarily or understates a real hazard.
- Raccoons. Raccoon latrines are the primary concern. Raccoon roundworm is shed in feces, and the eggs can persist in soil and attic dust long after the animal is gone, which is why latrine cleanup is remediation, not sweeping.
- Bats. Bat guano accumulates in mounds beneath roost sites and supports fungal growth. Bats are also the species most associated with rabies exposure in the United States, and a bat in a living space is handled differently from a bat in an attic.
- Rodents. Mice and rats contaminate insulation and surfaces with urine and droppings and are linked to hantavirus and salmonella exposure. Rodent work is as much sanitation as removal.
What Proper Cleanup Looks Like
Sanitization is a defined process, not a spray-and-wipe. The general sequence most practitioners follow:
- Contain. Seal the work area from living space with plastic sheeting and negative air pressure where feasible.
- Remove. Bag and remove contaminated insulation, nesting material, and droppings rather than attempting to treat them in place.
- Treat. Apply a disinfectant rated for the biological material present, following label directions for dwell time.
- Dry. Correct the moisture source and dry the space before reinstalling insulation, or the problem returns.
- Verify. Re-inspect after the exclusion work is complete to confirm no new activity.
When Cleanup Becomes Remediation
The line between cleanup and remediation is usually drawn at three factors: how long the contamination has been present, how enclosed the space is, and whether the contaminated area sits above or beside living space.
- Cleanup covers recent, limited contamination in a ventilated space, a small dropping area in an open attic, a single nest removed after exclusion.
- Remediation covers long-standing latrines, guano mounds, contaminated insulation across a large area, or any contamination in a sealed attic or crawlspace with air communication to the home.
A useful rule of thumb: if the contamination is measured in years rather than weeks, or if the space shares ductwork or a ceiling with a bedroom, plan for remediation and budget accordingly.
The Insurance Question
Homeowner policies vary widely on wildlife damage. Chewed wiring and resulting fire damage are sometimes covered, while rodent damage is commonly excluded and contamination cleanup is frequently treated as a maintenance item.
If you are weighing what damage actually costs and what insurance will cover, our breakdown of wildlife damage insurance traps explains which claims pay and which get denied.
Wildlife Attractants and Property Conditions
Wildlife attractants decide whether your property stays vulnerable. The building can be sealed perfectly and still draw animals back if outside conditions invite them.
The usual list:
- Food: unsecured trash, compost, fallen fruit, pet food left outdoors.
- Water: birdbaths, leaking irrigation, clogged gutters.
- Shelter: brush piles, wood stacks against the house, dense ground cover, raised decks with open skirting.
Preventative maintenance is generally less costly than exclusion. Trimming vegetation back from the roofline and moving woodpiles away from the foundation removes the ladder animals use to reach entry points.
DIY vs. Professional: Where the Risk Threshold Sits
DIY work is reasonable up to a clear threshold. Past it, the risk shifts from wasted effort to real hazard.
Do it yourself when:
- The evidence is old and the space is empty.
- You are sealing small exterior gaps with hardware cloth and sealant.
- You are removing attractants and correcting grading.
Call a professional when:
- There is active wildlife activity, especially with young present.
- Droppings are concentrated in an enclosed space.
- Wiring, ductwork, or structural members are damaged.
The threshold is not about difficulty. It is about what happens if you get it wrong.
Wildlife Exclusion Services Cost and Long-Term Value
The long-term math favors exclusion over repeat removal. Removal without exclusion is a recurring expense, and each cycle adds damage.
For a full pricing breakdown by job type, read our professional wildlife removal cost guide.
Ekoterra Gopher Pest and Wildlife Control serves Ventura, Los Angeles, and Santa Barbara Counties with eco-friendly methods and guaranteed results.
Schedule Your Residential Wildlife Inspection
The gap between hearing a noise and fixing the cause is where damage accumulates.
Ekoterra Gopher Pest and Wildlife Control provides eco-friendly pest and wildlife management with guaranteed results. Our services protect your health and family and protect the environment.
If you have seen droppings, heard scratching, or found a gap you cannot explain, schedule your residential wildlife inspection and get a clear assessment before the problem grows.
Frequently Asked Questions
What is included in a professional residential wildlife inspection?
A professional wildlife inspection generally includes an exterior check of the roofline, soffit, fascia, vents, chimney caps, and foundation, an interior check of the attic and crawlspace, and a review of attractants on the property.
How often should you have a wildlife risk assessment performed on your home?
Assessment frequency depends on the property and its history; ask a qualified wildlife professional for a recommendation suited to your home.
What are the common signs of wildlife entry points in residential attics?
Look for torn ventilation screens, gaps where the soffit meets the fascia, chewed flashing, droppings near insulation, stained ceiling patches, and nesting material packed into corners. Scratching or thumping at dawn and dusk points to active wildlife activity. From the ground, scan the roofline for rub marks and entry holes roughly the size of a golf ball or larger.
How much do wildlife exclusion services cost?
Pricing depends on quantity, dates, and delivery; for current prices or a quote, contact Ekoterra Gopher Pest and Wildlife Control through its website.
